Actions
Actions are an interactive simulation of real-life products in the virtual 3D space. Their main purpose is to depict the product’s functions and capabilities through animation, or its variance through configurator setup via Material changes. By design, Workspaces that generate interaction spark more customer amusement and result in better visibility of the product, especially from the technical side. This document intends to cover the basic principles of setting up Actions and some common strategies to implement them.
Action is a 3-step sequence that integrates Transitions, Modifiers and Rules to simulate some of the product’s functionalities in the digital 3D space.
The Action feature is located in the Main Ribbon, under the “Actions” name (the button with the “Clock” icon in Figure 1.).
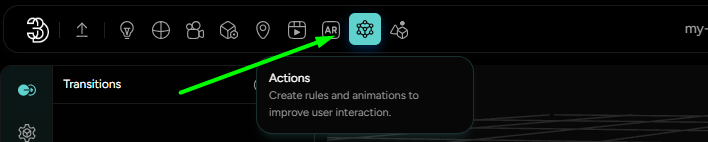
After clicking on “Actions”, the Action workspace opens up in the Left-side Editor panel with Transitions as a starting point for setting up the Action chain (Figure 2.). Modifiers and Rules are located in the Left-side Vertical bar (Figure 2.) in order that corresponds to the Action being set up and enabled.
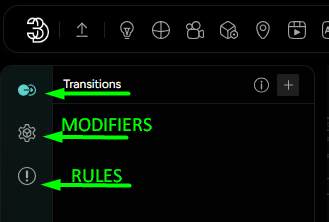
As with every other feature so far, a new Transition, Modifier or Rule can be added by pressing the “plus” (+) icon and choosing the desired option. Alternatively, Modifiers can be directly set up from stemming Transitions. It is also worth noting that Rules can also be case-coded during the integration process, but this document will solely cover setting up Actions from the 3D Artist’s perspective. For a code-based approach, feel free to reference our API documentation in the Help center.