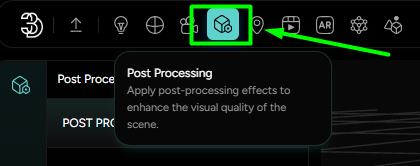
Post Processing
Post-processing in the world of computer graphics and 3D rendering refers to the art and science of applying filters and effects to an image or a sequence of images after they have been rendered. This step often takes place in the final stages of the rendering pipeline and can drastically enhance or alter the mood, depth, and visual fidelity of the final output.
The Post Processing on the Threedium Platform allows users to apply a range of visual effects to their 3D scenes, helping to create a more cinematic presentation. These settings are applied after the main rendering and do not affect the scene geometry, only how it appears on the screen.
Introduction
To start using post processing effects, you first need to enable them with the PP toggle, located in the PP tab. This switch activates or deactivates all post processing effects applied to your scene. You can name your post processing setup - useful for organizing and managing multiple effect presets. If needed, you can also delete the current post processing setup or add a new one by clicking the + icon in the right corner of the PP tab.
AA - Anti-Aliasing
Anti-Aliasing, commonly abbreviated as AA, is a technique used in computer graphics to reduce visual artifacts known as "aliasing." Aliasing appears as jagged or pixelated edges along the boundaries of objects in a digital image and is particularly noticeable on diagonal or curved lines. Anti-Aliasing smooths these edges, creating a more polished and visually appealing image.
The AA settings include:
-
Mode - a dropdown where you can choose between two anti-aliasing methods:
-
SMAA (Subpixel Morphological Anti-Aliasing)- SMAA is a post-processing image-based method, which means it operates on the image after rendering is done, analyzing patterns in brightness and contrast to detect edges.It involves morphological techniques and heuristics to handle subpixel coverage and provide high-quality anti-aliasing.
SMAA is versatile and can handle anti-aliasing for geometry, shaders, and textures. It aims to combine the quality of Supersampling and MSAA while being faster and less demanding, making it a good choice for real-time applications.
SMAA includes features like color edge detection and depth edge detection to handle complex types of aliasing.

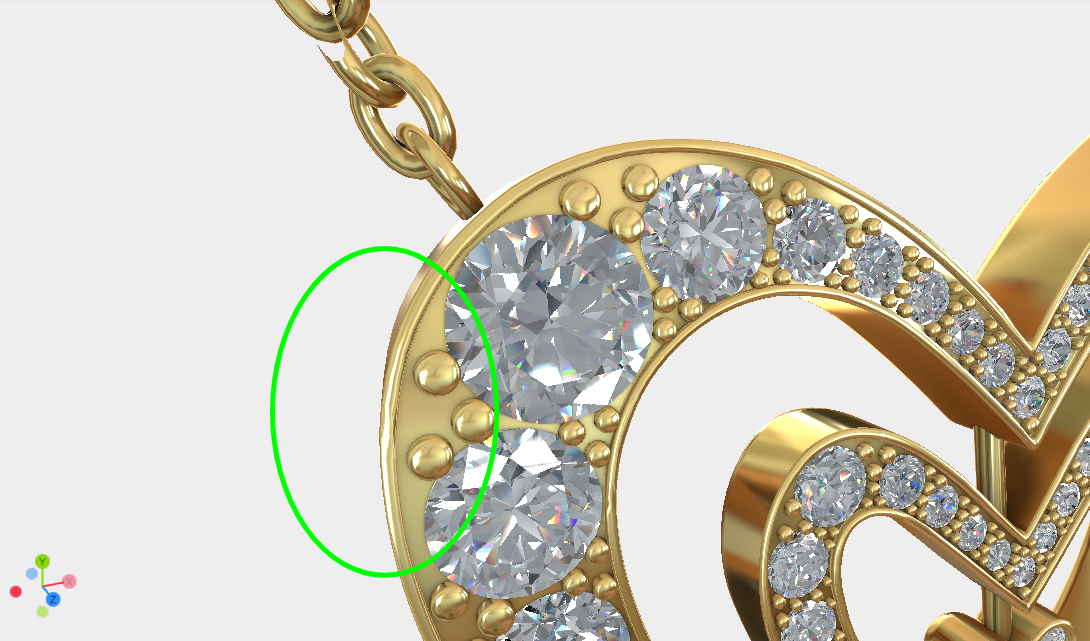
Figure 3. SMAA enabled -
MSAA (Multisample Anti-Aliasing)- Works by sampling each pixel multiple times at different locations within the pixel and then averaging the results to get the final color.It is a hardware-driven technique, which means it is implemented at the GPU level and can be very efficient.
MSAA is applied only to the edges of polygons (not the whole scene), making it efficient in terms of memory usage.
It offers good quality anti-aliasing with a relatively low performance hit compared to other high-quality methods like Supersampling (SSAA).
MSAA does not smooth textures applied to geometry; it only smooths out geometric edges (no shader/texture aliasing).
-
-
Preset - allows you to select the quality level of the chosen method: low, medium, or high
-
TAA (Temporal Anti-Aliasing) - a toggle to enable or disable TAA for additional edge smoothing over time.
-
TAA Preset - once TAA is enabled, you can select its quality level: low, medium or high

When expanding the settings by clicking on the three horizontal lines, the AA settings also offer advanced options:
Edge detection mode- an essential component that determines where aliasing is most likely to occur and thus where anti-aliasing needs to be applied. Edge detection can be based on different criteria:- Color - this mode detects edges by looking for areas with significant color differences. When colors contrast sharply, it is an indication that there's an edge—a boundary between objects or between an object and the background. Anti-aliasing techniques that use color-based edge detection will smooth out these transitions.
- Depth - rather than looking for color changes, this mode detects edges by examining the depth buffer, where each pixel's distance from the camera is stored. Sudden changes in depth values typically indicate edges. Depth-based detection is particularly useful for dealing with geometric aliasing, as it can smooth edges based on the 3D geometry of the scene regardless of color.
Edge detection threshold- in the context of anti-aliasing is a value that determines how sensitive the edge detection algorithm is to changes in color or depth. This threshold helps the algorithm decide whether a change is significant enough to be considered an edge that requires anti-aliasing.- Low Threshold - setting a lower edge detection threshold means the algorithm will be more sensitive and will identify more subtle differences as edges. This can result in a smoother image but also has the potential to blur details because even small variations in color or depth may be treated as edges.
- High Threshold - conversely, a higher threshold means the algorithm will only consider larger differences as edges. This can preserve more detail within the image but may leave some jagged edges untreated, especially in areas of subtle contrast.
Emulate Background- if the viewport is set to be transparent, here users can set some background color that would be on the background of the scene once the workspace is integrated into the webpage. Here a color can be assumed, and that is the background color that would be taken into calculation while applying the AA.
SSAO - Screen Space Ambient Occlusion
Screen Space Ambient Occlusion (SSAO) is a rendering technique used to improve the realism of 3D scenes by calculating how accessible each point in a scene is to ambient lighting. By simulating the way light is occluded by nearby geometry, SSAO enhances the depth and contour of objects, making the indirect shadowing more pronounced in the nooks and crannies where light is less likely to reach.
In simple words, SSAO is a dynamic method for calculating ambient occlusion in real-time, as opposed to using pre-baked AO maps. As it's calculated in real-time, SSAO can respond to changes in lighting, camera position, and geometry, making it suitable for interactive scenes and games. Performance Impact: While SSAO can be tuned for performance, it is a screen-space effect and may still have a notable impact on frame rates, especially on lower-end hardware or with high-quality settings.
SSR - Screen Space Reflections
Screen Space Reflections (SSR) is a real-time rendering technique that adds reflections to surfaces based on information already rendered to the screen. It enhances visual fidelity by creating the appearance of reflective surfaces without the computational overhead associated with more accurate but resource-intensive methods such as ray tracing.
In simple words, it is a great addition for highly reflective surfaces, and it adds reflections from part to part.
Thickness- more depth to the reflexions, infinite: everything becomes reflective, but it is not good for performance.Fresnel- is the observation that surfaces reflect light more strongly at glancing angles than at direct (normal) angles. In simple terms, it means that when you look at a surface straight on, it reflects less light, but as you start to view it from a sharper angle, closer to edge-on, the reflection becomes more intense and noticeable. In computer graphics, simulating the Fresnel effect helps create more realistic renderings of materials like glass, water, and polished surfaces, adding an extra layer of realism to the way they interact with light.Distance Attenuation- will it look at the distance for calculations or not.Metalness influence- apply to just the materials that have roughness.
Tone Mapping
Changes the colors (tones) by some function → takes that color recalculates and then gives a different color in simple words.
There are 4 predefined tone mappings: REINHARD, REINHARD2, OPTIMIZED_CINEON, ACES_FILMIC.
There is an Exposure option, a slider that controls the overall light intensity in the scene. Increasing exposure brightens the scene, while decreasing it makes it darker.
There is also an option to configure the Brightness, Contrast, Hue, Saturation and Vibrance in the COLOR ADJUSTMENT section.
LUT
A Look-Up Table (LUT) in the context of digital imaging and computer graphics is a mathematical means to remap color values. It's a predefined table that transforms the input values of a color space to desired output values, which is used for various purposes, such as color correction and color grading.
LUTs can be used to enhance the visual output dynamically, adjusting colors on-the-fly to fit the artistic direction.
Bloom
Bloom is a post processing effect that simulates the soft glow of bright light spilling over into surrounding areas - similar to how intense lighting behaves in real- world cameras. It adds a sense of realism and visual appeal, especially in scenes with strong highlights or glowing objects.
Characteristics of Bloom
- Glow Effect: Bloom adds a halo of light around bright areas, softening the image and suggesting a high dynamic range.
- Atmosphere: By fusing light into surrounding pixels, bloom can enhance the mood of a scene, indicating a romantic or fantastical quality.
Available settings:
Luminance Threshold- This parameter determines the brightness level a pixel must reach before the bloom effect is applied to it. Only pixels brighter than the threshold will contribute to the glow, ensuring that the effect doesn't wash out the entire scene.Toggle- turns the bloom effect on or off. Intensity - controls the overall strength of the glow. Higher values create a more dramatic bloom.- Luminance smoothing
Smoothing- Often referred to as "knee" or "soft knee," this aspect controls the transition between the areas affected and unaffected by bloom. A smoother transition results in a more natural-looking glow, preventing the effect from appearing like a harsh, added layer.Radius of Bloom- This parameter specifies the size of the glow surrounding the bright areas. A larger radius results in a more widespread halo effect, while a smaller radius confines the glow tightly around light sources.
DOF
Depth of Field (DOF) is a photographic and rendering effect that refers to the range of distances within a scene that appear acceptably sharp in an image. When a camera or a virtual camera in 3D graphics focuses on a particular point, objects at that distance are sharp, while objects closer to or further from that point fall off into softness or blur.
DOF is simulated to give a more realistic camera effect, commonly used to direct the viewer's attention, highlight specific scene elements, or create a cinematic look.
Components of DOF
Focus Distance- This parameter sets the distance from the camera at which objects appear in perfect focus. It's the starting point of the depth of field effect.Focal Length- Related to the camera's lens, the focal length in three.js affects the magnification of the scene and has an impact on the depth of field. A longer focal length will produce a shallower depth of field (more blur), while a shorter focal length widens the field of view and increases the range of sharp focus.Bokeh Scale- The term "bokeh" comes from a Japanese word meaning blur. In the context of a DOF effect, the bokeh scale controls the quality and intensity of the blur that occurs outside the focus distance. It defines how pronounced the blur effect is for out-of-focus areas, affecting the aesthetic quality or "feel" of the blur (e.g., how soft, dramatic, or realistic it might seem).
Vignette
Vignette darkens the edges of the screen to draw attention toward the center of the frame. It adds a subtle cinematic tone or can be used to guide viewer focus.
Available settings:
- Toggle - turns the vignette effect on or off.
- Darkness - controls how strong the darkening effect is around the edges.
- Offset - adjusts how far the vignette reaches into a center of the screen.
This effect is especially useful for framing your 3D content more naturally and giving the viewer a more immersive focus.