Features
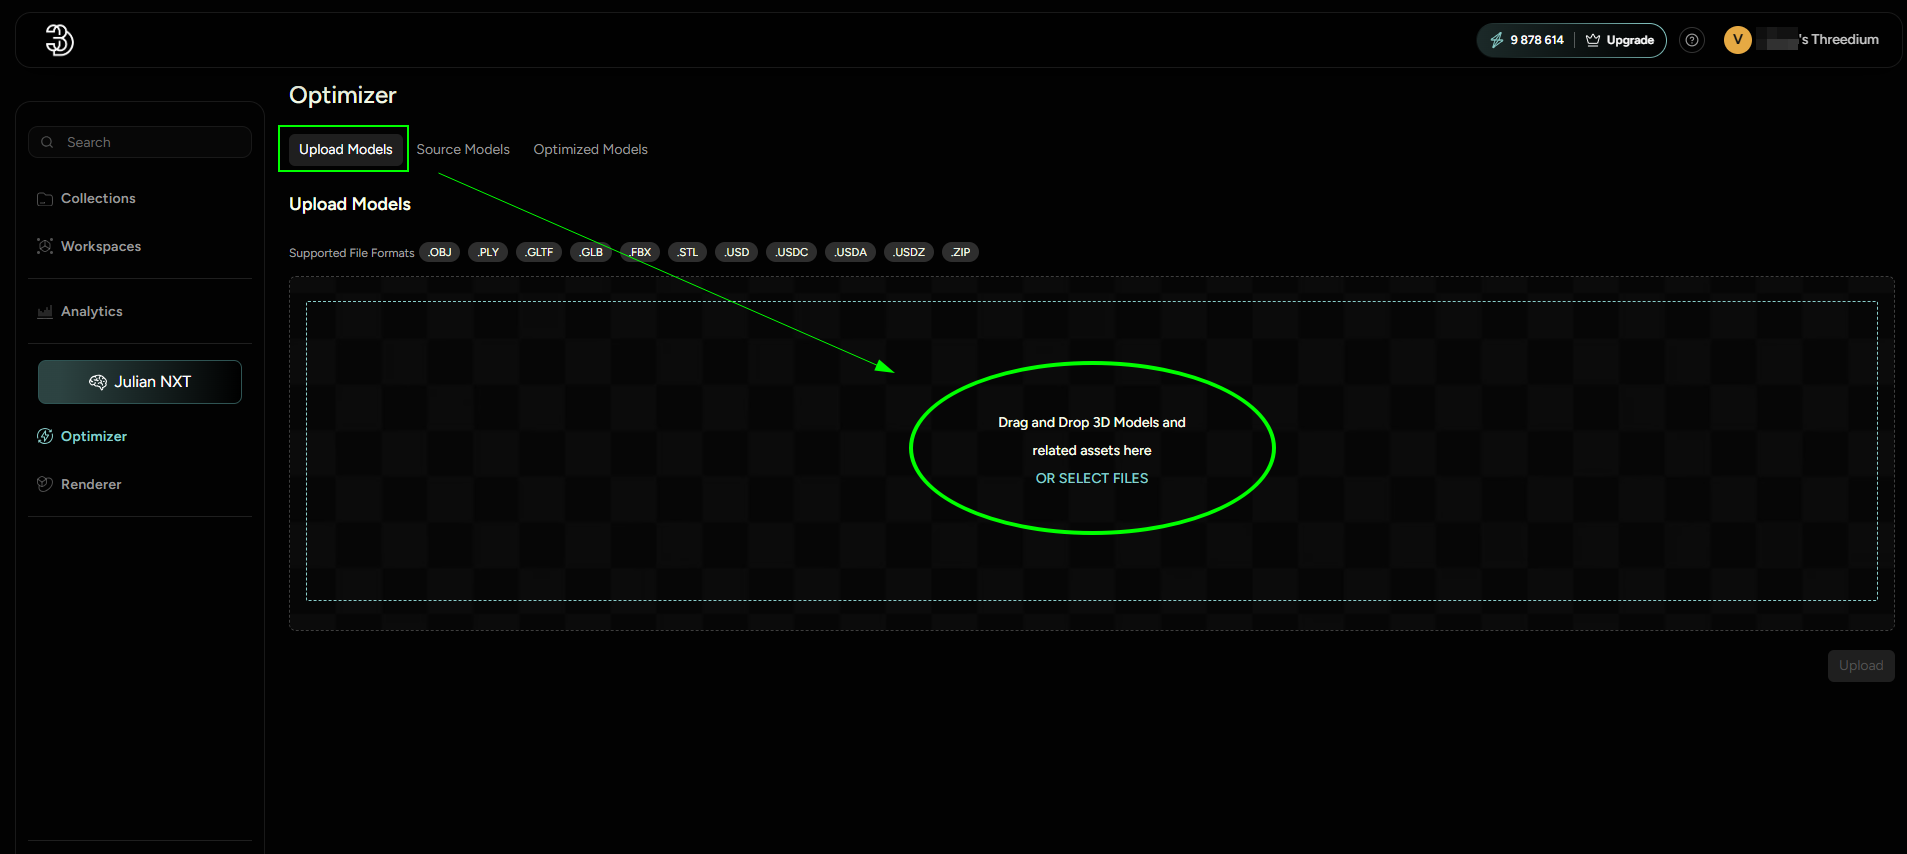
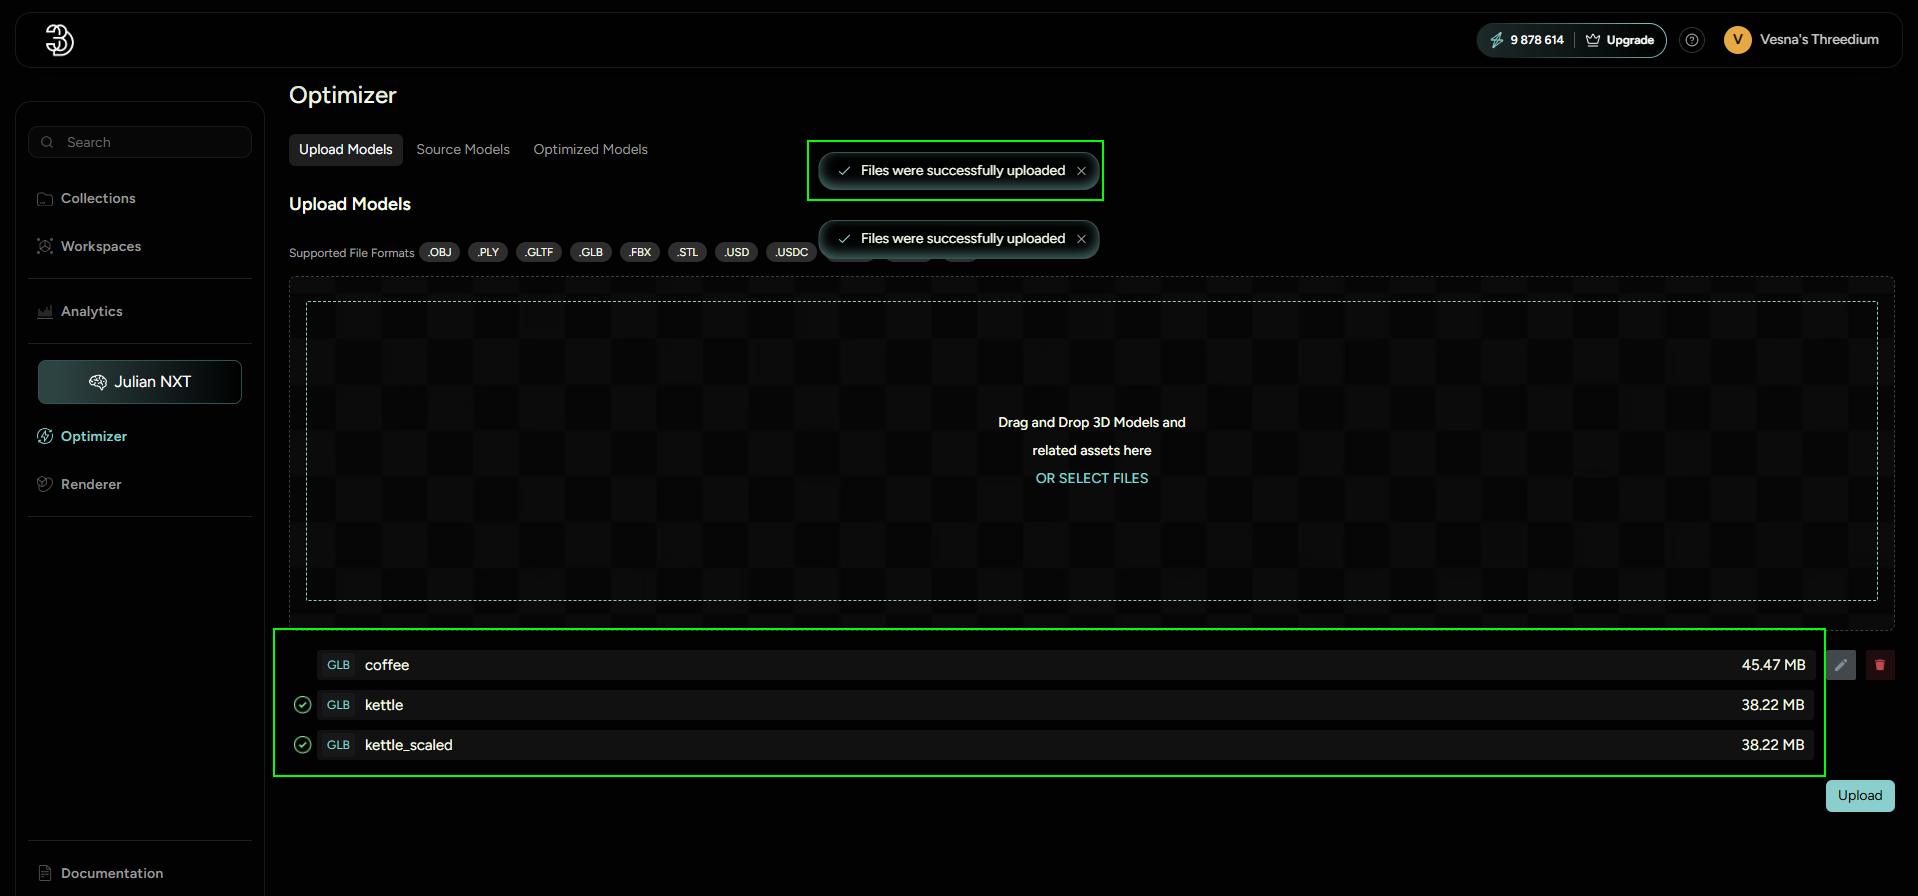
Batch Uploads
Users can upload multiple 3D models simultaneously, streamlining the preparation process.
File Inspection
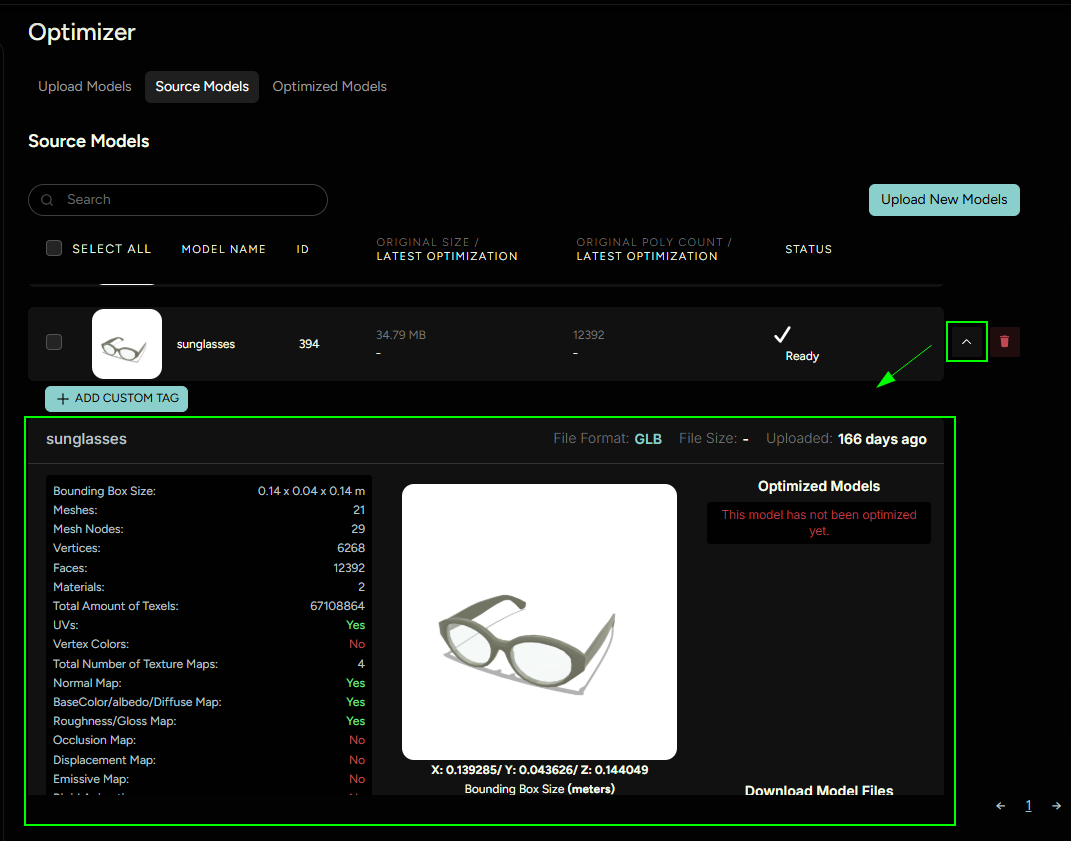
In the Source models tab, users can find all of the imported models.
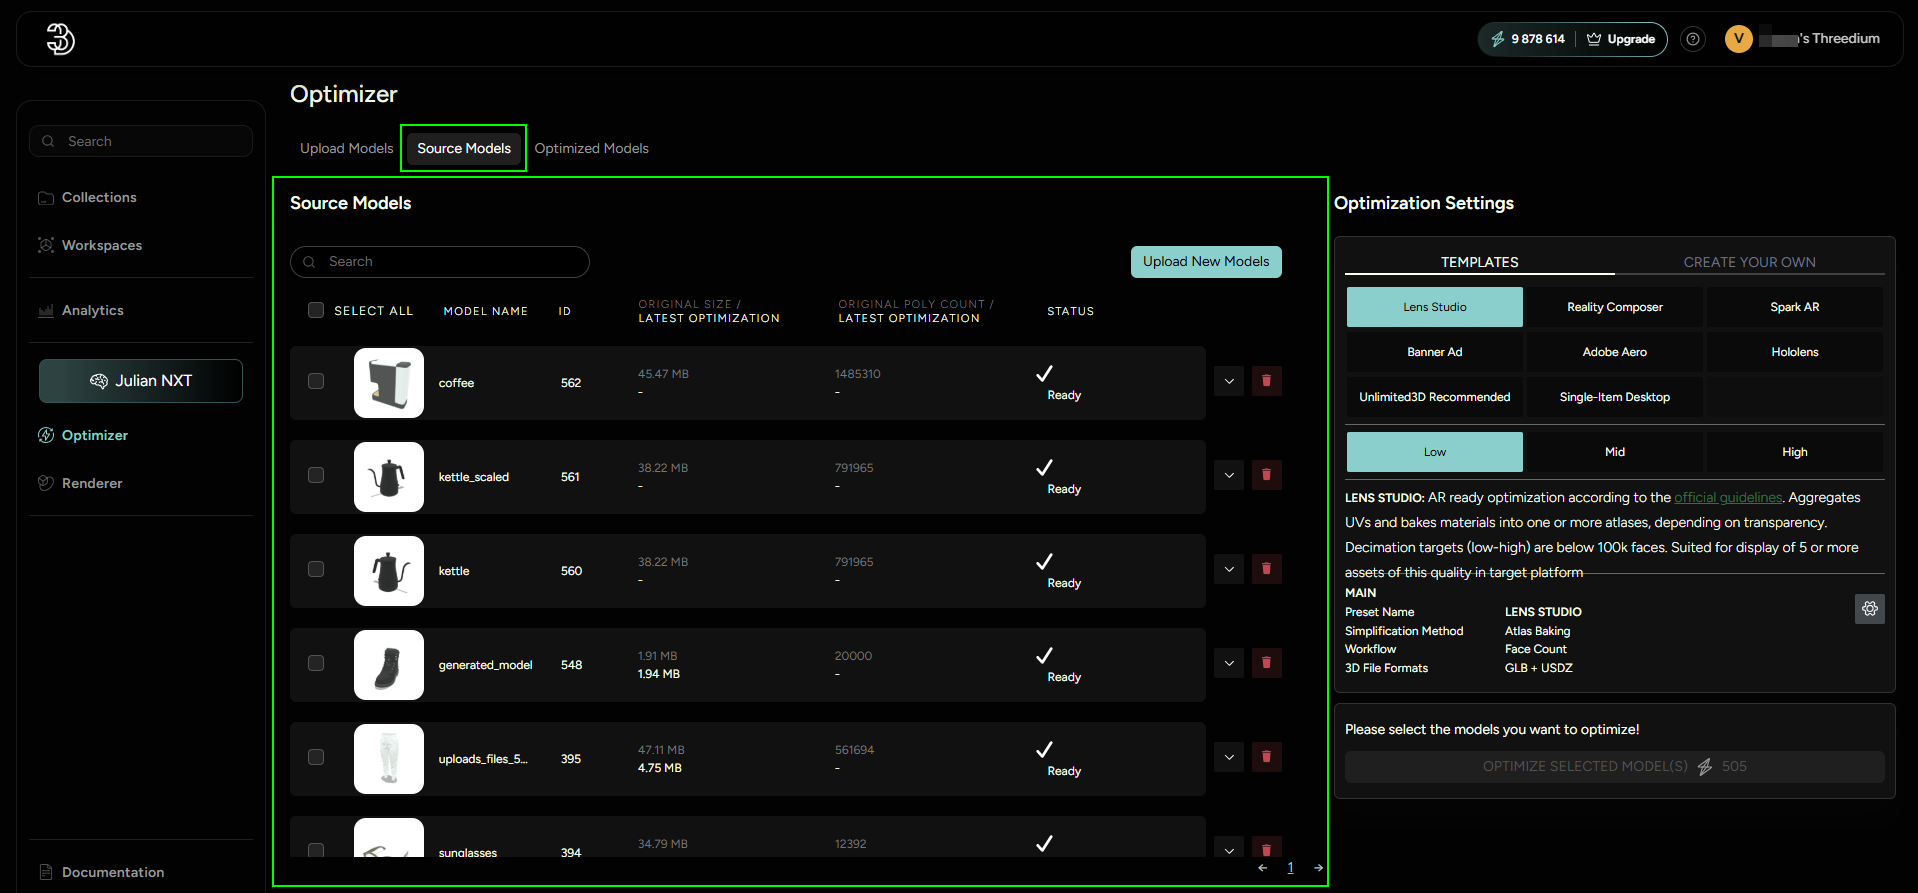
Here they can see the specifications e.g. number of vertices, faces etc. connected to each imported model.
Predefined Presets
Optimize models using factory presets calibrated for specific 3D applications or purposes. There presets can be found in the Templates section. One of them is Banner Ad Preset - for banner ads the optimization needs to be maximized, because of this, this preset is set to drop the polygon count to 15k, and texture resolutions to 512px.
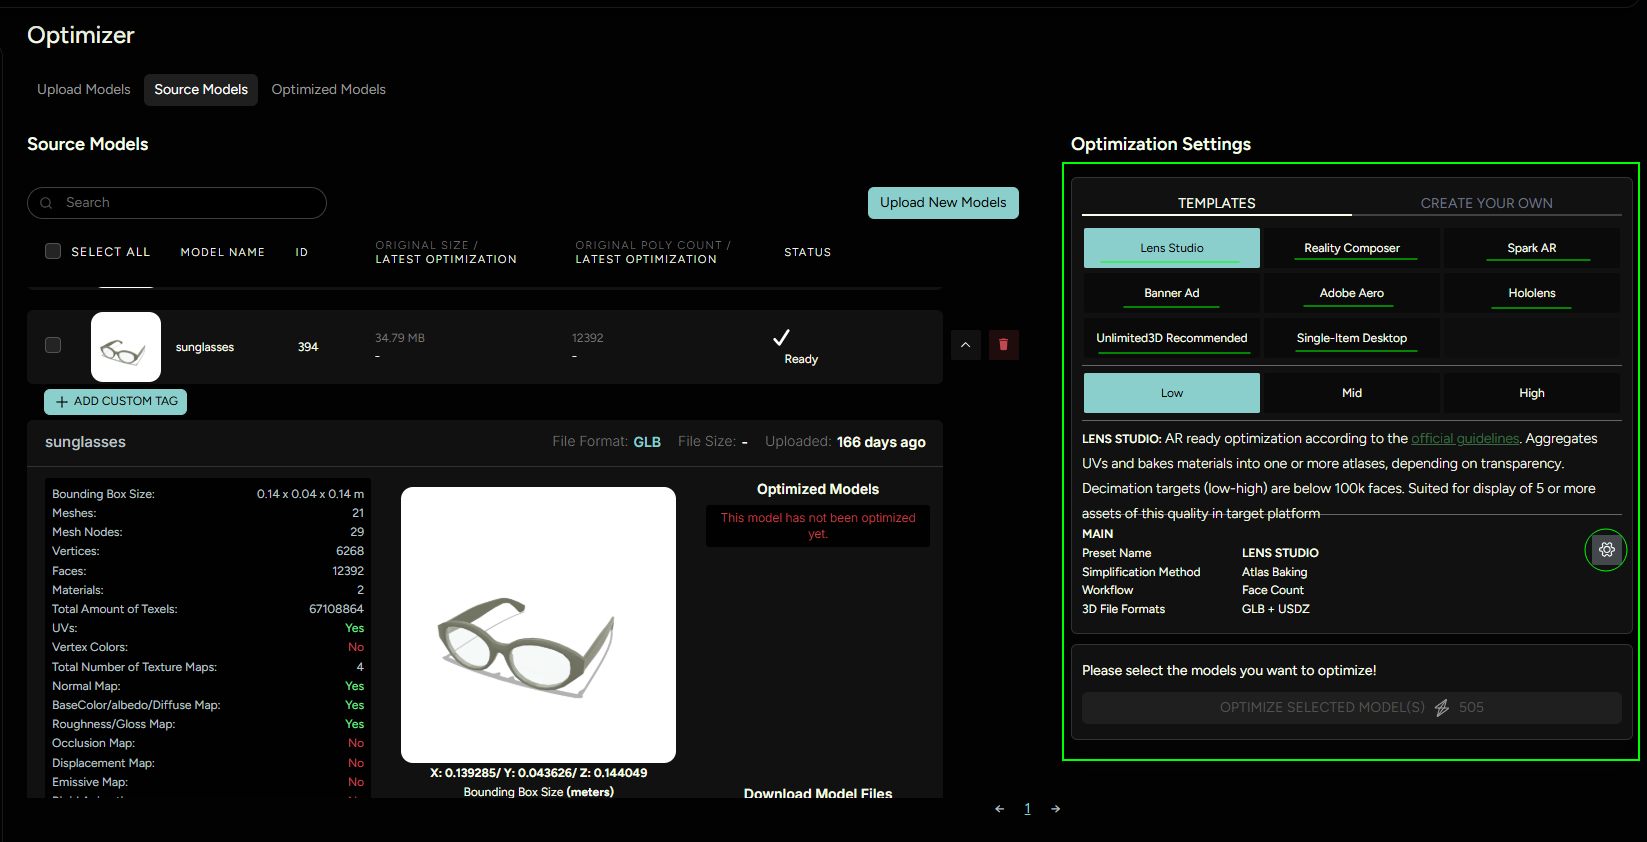
Click on the Settings icon to see the specification of the selected template optimizer.
Custom Presets
Create unique presets with tailored settings to meet the precise needs of your project. Presets can be found in the Templates section. One of them is Banner Ad Preset - for banner ads the optimization needs to be maximized, because of this, this preset is set to drop the polygon count to 15k, and texture resolutions to 512px.
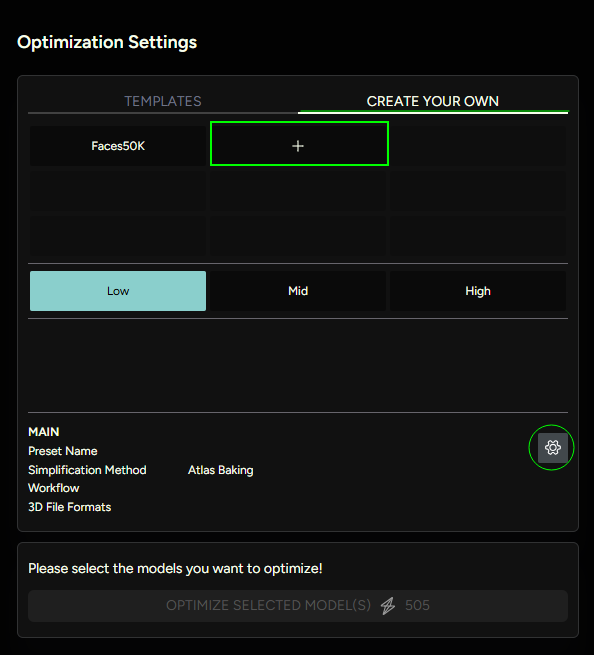
Selecting the custom template and then clicking on Settings will open available options for building an optimizer. User can set a unique name and description, along with customizing the options.
There are 3 sections of options:
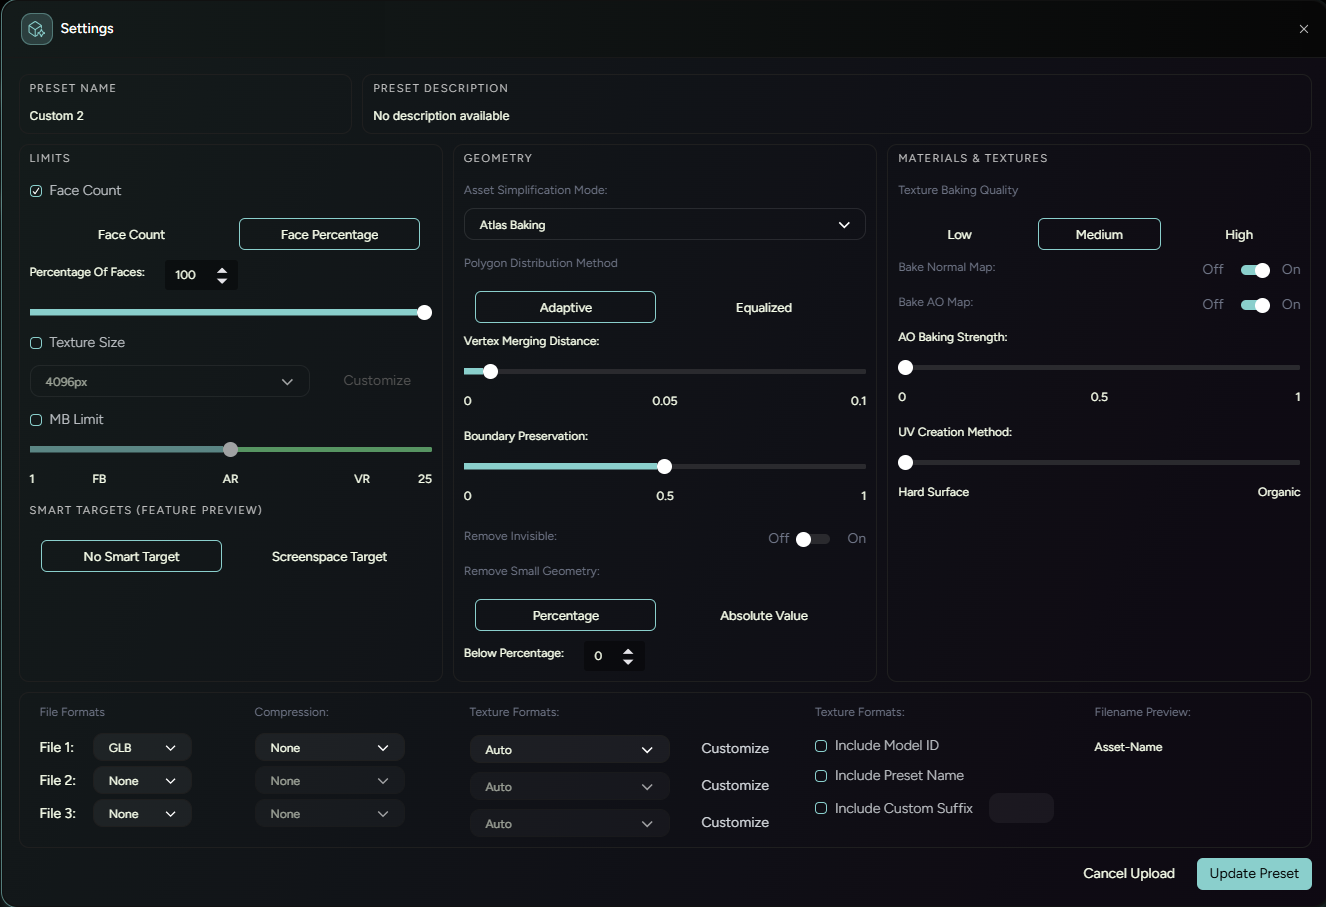
Section 1: Limits
User can select (✔) which of the options should be applied in the optimization process.
- limit the number of faces by percentage or by count
- limit resolution of textures, there are 2 options:
- limit all the textures equally
- have different limits for different types of textures by clicking on Customize button (e.g. choose to have higher resolution for normal maps)
- limit the size of the file itself
Section 2: Geometry
Asset Simplification Mode:
-
Atlas BakingAtlas Baking is an advanced optimization technique designed to comprehensively streamline a 3D model's geometry and texture data. When activated, this mode restructures the model's mesh topology by consolidating all elements into a single, unified mesh with one associated material. Despite these significant alterations under the hood, the observable aesthetics of the model are meticulously preserved.
This mode is particularly suited for scenarios demanding peak optimization, where a premium is placed on rendering efficiency. An ideal use case for Atlas Baking would be within applications hosting straightforward 3D visualizations, such as lightweight viewers that do not require complex animations or material swapping.
It's important to note that, should the end-use case necessitate a high degree of interactivity—such as a product configurator with multiple customizable features—additional steps must be taken post-optimization. Users will need to segment the unified mesh back into distinctive parts, as well as reapply UV mapping and recreate individual material properties to accommodate the configurator's interactive elements.
Atlas Baking is thus recommended when the highest level of model optimization is needed, with the understanding that there will be a trade-off in terms of post-process flexibility.
-
Preserve TilingThe Preserve Tiling option safeguards the continuous appearance of tilable materials in your 3D model. When models have materials designed to repeat seamlessly—such as textures that mimic surfaces like fabric, brick, or wood—it's essential to maintain the pattern's consistency.
Utilizing Preserve Tiling during the optimization process is crucial if your model relies on these repeatable textures for its visual appeal. This feature ensures that the tiling properties remain untouched, resulting in a model that looks just as intended, even after being optimized for performance.
-
Preserve Mesh & Material NodesThe Preserve Mesh and Material Nodes option is tailored to maintain the distinct segments of your 3D model while enabling internal optimizations. This feature carefully adjusts the topology within each part of the model, optimizing them according to the selected settings. Consequently, this optimization alters the UV maps as they are intrinsically linked to the mesh topology.
With the change in topology, materials are also impacted and may transform to suit the new structural layout. The major advantage of this feature lies in its ability to keep individual parts and corresponding materials separate even after optimization. However, due to the changes in mesh topology and UV maps, previously utilized materials may not necessarily be compatible post-optimization.
Selecting Preserve Mesh and Material Nodes allows for component-based optimization while preserving the model's partitioned structure. It's important to recognize that while the parts and materials stay isolated, their underlying meshes and UVs will be optimized, necessitating potential adjustments to any pre-existing materials.
-
Preserve UVsThe Preserve UVs feature offers a more conservative approach to optimization. Like the previous option, it maintains the separate elements of a 3D model intact. In addition to this, it ensures the UV map — the coordinates that tell the model how to apply its textures — remains unchanged.
This restrained optimization process may result in a less dramatic reduction in complexity, yet it serves well in scenarios where extreme fidelity to the original UV layout is a priority. It is particularly advantageous when the highest level of optimization is not necessary, but a moderate reduction in detail suffices and the preservation of part separation and existing UV mappings is crucial for the project's success.
When the integrity of a model's textures in relation to its geometry is of utmost importance, and a mild optimization meets the requirements, the Preserve UVs option is the optimal choice, ensuring that the UV structure and the model's segmentation are kept precisely as designed.
-
Drop Textures to Material ColorsThe Drop Textures to Material Colors feature simplifies your 3D model's textures by condensing all textures into a single diffuse map. In this process, the model’s mesh components are merged into one consolidated mesh structure, while the optimizer analyzes the original material properties.
The optimizer works diligently to encapsulate the essence of the different material specifications and emulates them within one comprehensive diffuse map. This method is particularly useful for streamlining the texture information and reducing the complexity of managing multiple materials and textures.
Polygon Distribution Method
When optimizing a 3D model's polygon count, two distinct methods can be applied to determine how the reduction is distributed across different parts of the model:
-
EqualizedThe Equalized method ensures a uniform optimization across the entire model. It proportionately reduces the polygon count of each component, ensuring all parts of the mesh receive an equal degree of simplification. This method is ideal when you want a consistent level of detail throughout your model.
-
AdaptiveIn contrast, the Adaptive method applies a selective optimization strategy. It reduces the polygon count variably, giving more attention to certain areas while preserving details in others. Consequently, some parts of the mesh may undergo a greater reduction than less critical areas.
Vertex Merging Distance
By specifying this value, the optimizer is instructed to merge all vertices that are below this distance threshold, while preserving separation for vertices that have a distance greater than the specified value during the optimization process.
Boundary Preservation
Boundary preservation in 3D models means keeping the outer shape intact during changes. This is crucial for maintaining the model's overall structure accurately. By setting a percentage for boundary preservation, you tell the software how important it is to keep the edges or boundaries untouched. A value of 1 means the edges must stay unchanged.
Remove Invisible
This option informs the optimizer if it can remove all the invisible parts of the model.
Remove Small Geometry
This feature enables users to decide whether to eliminate small components from the geometry. Users can specify the size of these components either as a percentage or by an absolute count.
When the percentage option is chosen, the software calculates the bounding box of a specific part and compares it to the overall bounding box of the entire model. Any parts that fall below this specified percentage of the model's bounding box will be removed.
Similarly, when the absolute value is set, any part with a bounding box smaller than the specified size will be deleted from the geometry.
Section 3: Materials & Textures
Here user has the option to choose the quality of the texture baking, baking normal and AO maps and also give information about the type of 3D - is it more on the organic side, or has hard surfaces.
Section 4: Download options
Users can choose which file formats they want to download after the optimization has been finished.

Automatic Processing
Once the template is selected, select the models that you would like to optimize, and activate the process. This will take a few minutes.
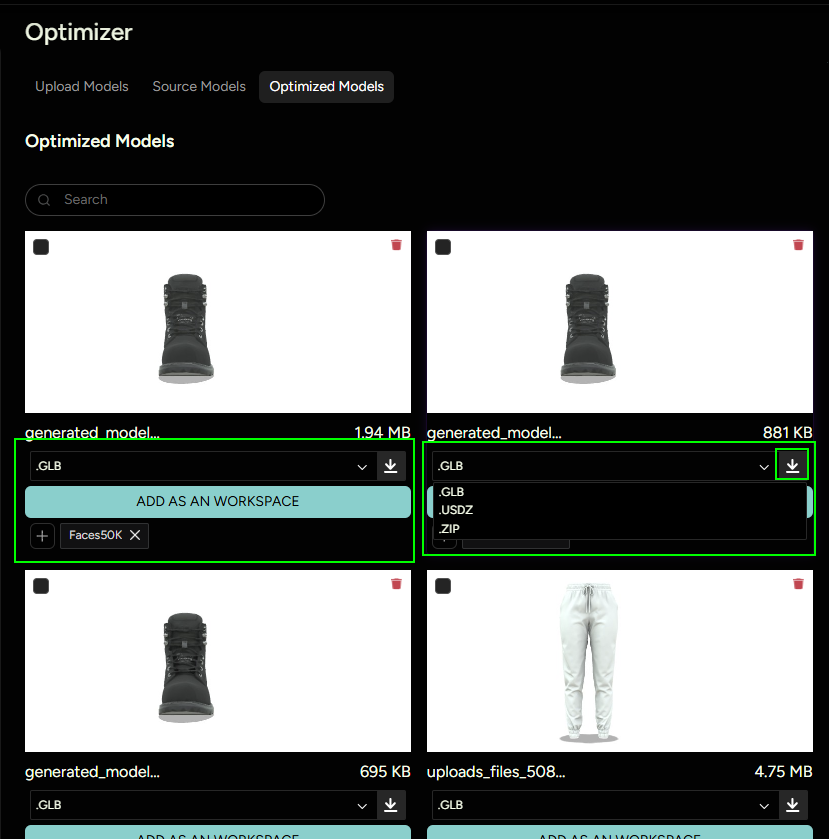
Seamless integration & Direct Downloads
Once the selected model has been optimized, the new model would show up in the OPTIMIZED MODELS section.
- Optimized models can be directly imported into workspaces, ensuring a smooth workflow transition.
- Users have the option to download the processed 3D models for use outside the platform or for archival purposes.