3D Model Optimization
We are using Blender for purposes of this tutorial
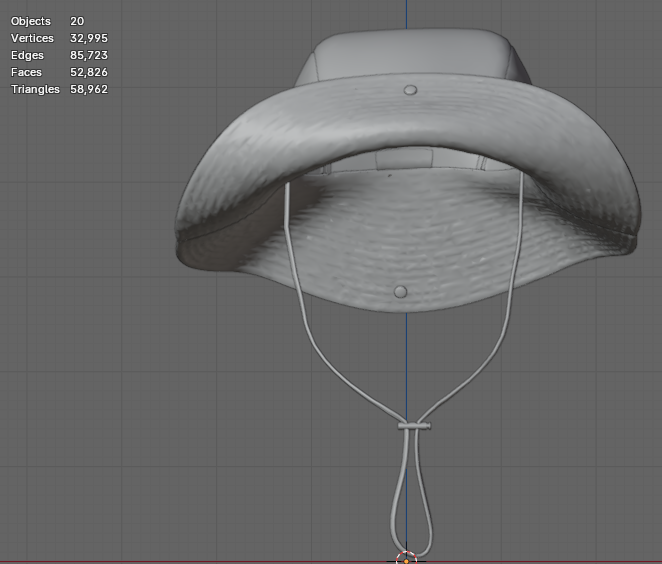
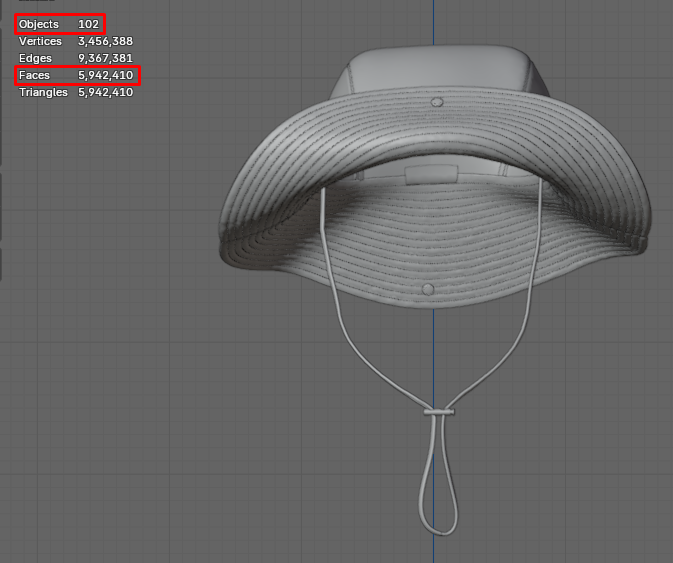
Shown in Figure 1. is a .glb file we will be working with. Marked in red is a starting polycount and mesh number, far exceeding the optimal values of
- 30 meshes
- 80k polygons
Keep in mind that, while sticking to (and staying below) optimal values is recommended, certain scenarios might call for compromise. In many cases, a higher mesh count will not present as big of an issue as a much higher polycount would. That is why it is advised to always aim for models ranging to the maximum of 200k polygons.
However, as the manual process of optimization allows for planning out and distributing resources strategically, most of the time even complex models can be brought all the way down to approximately 50k polygons, which ensures saving up on storage space immensely.

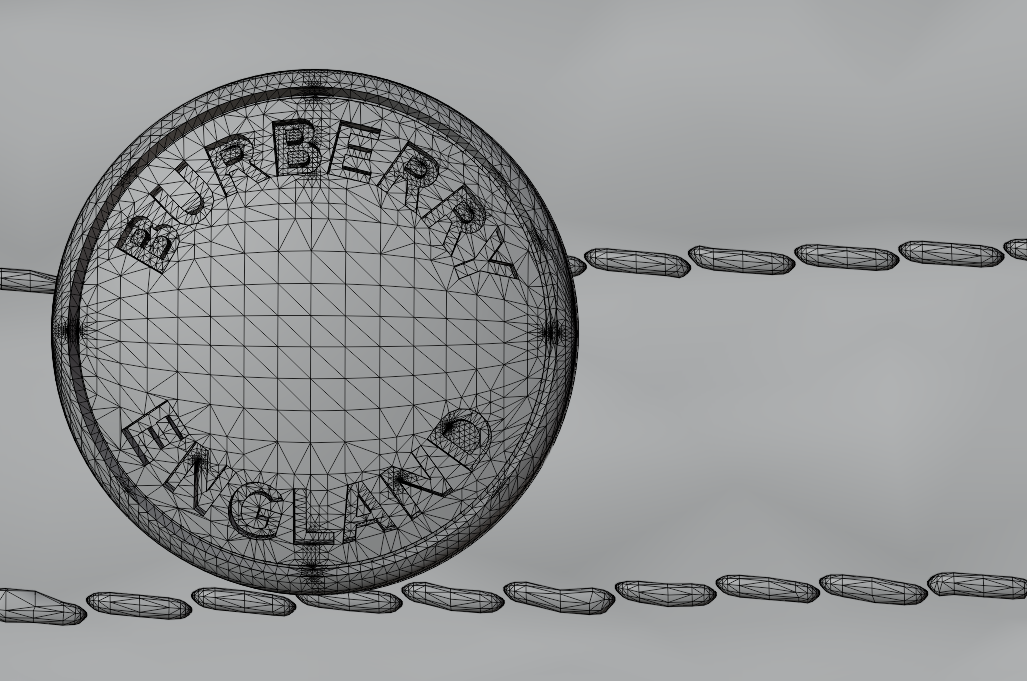
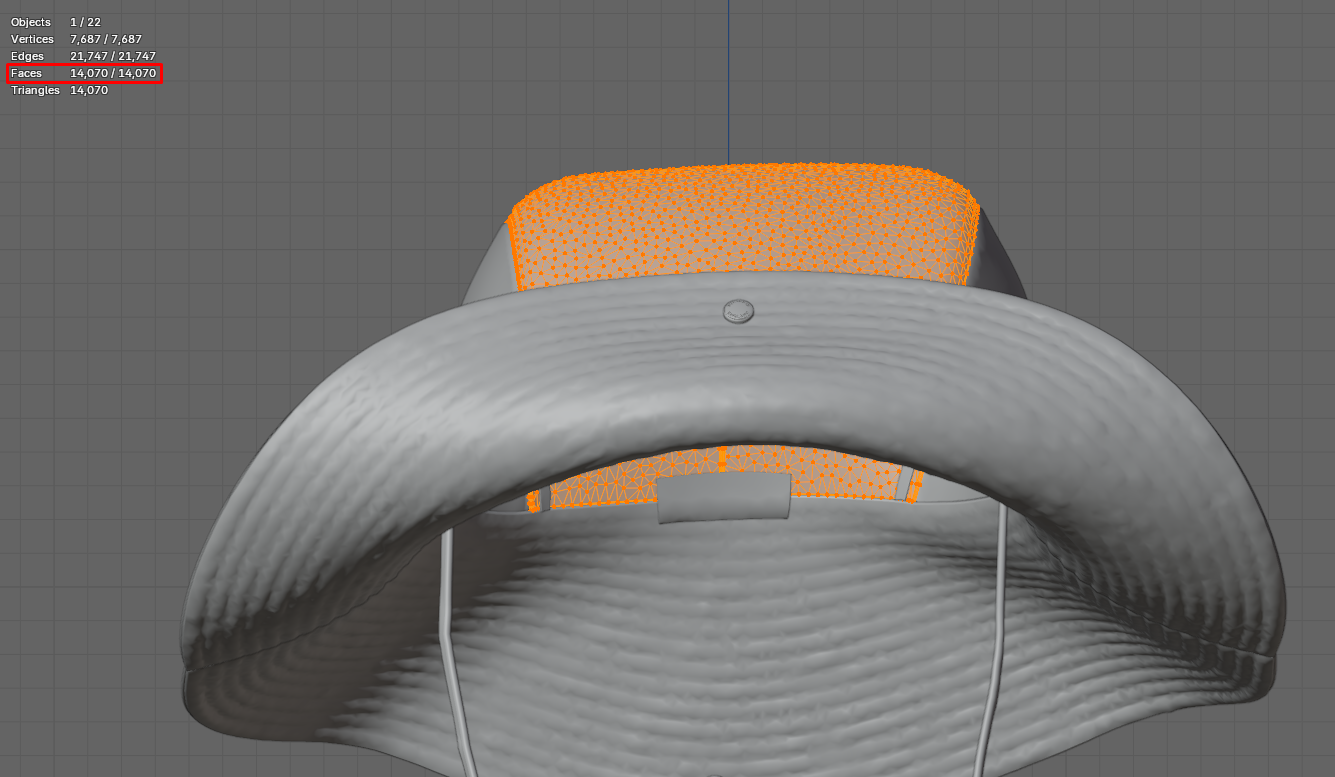
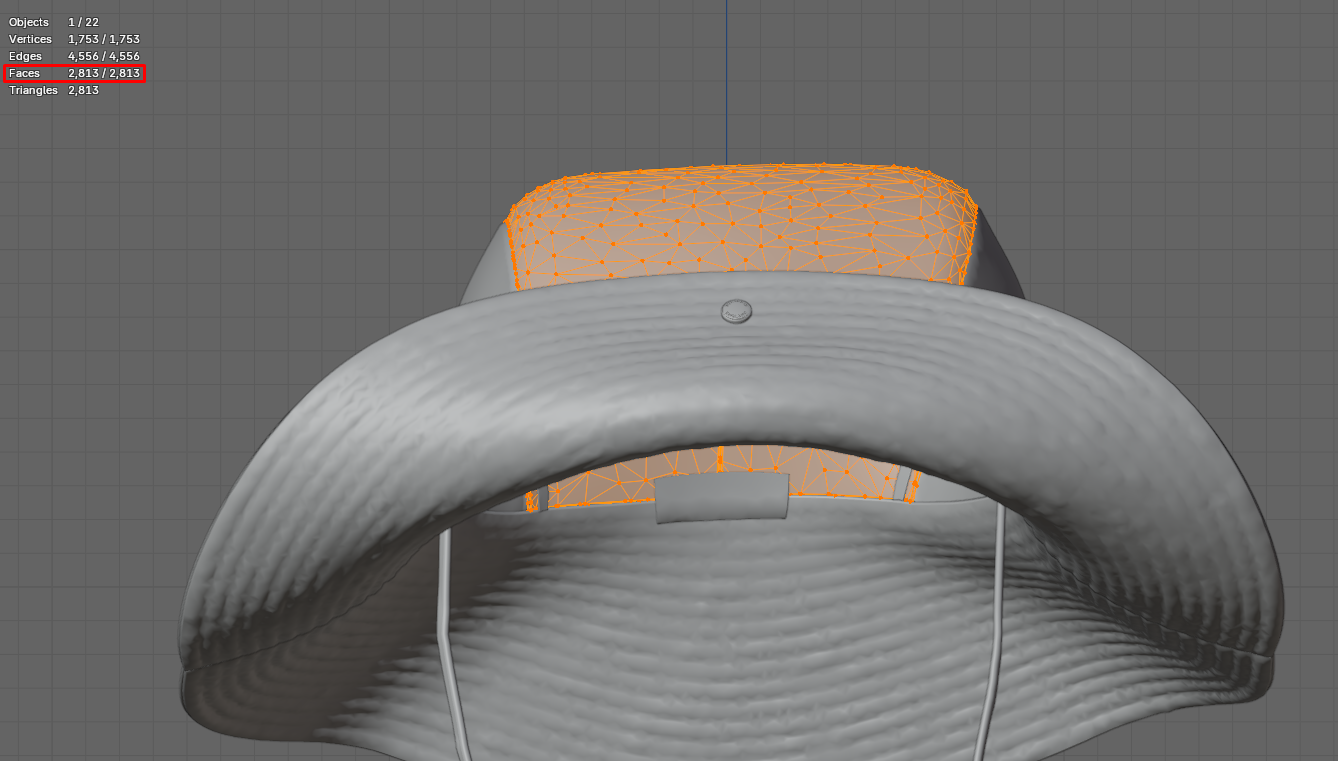
By taking a closer look at the mesh topology, it becomes clear that a noticeably large quantity of polygons is added up in the form of relatively inconspicuous details such as stitches and rivets. (Figure 2.)
It is common practice for camera controls to have limited distances set, in order to prevent customers from zooming in on products to the point of camera intersecting with the object, as well as zooming out indefinitely. While this document won’t focus on workspace setup, it is useful to keep in mind that not all details will be visible in distribution, an therefore there is no need for keeping the detail level so high.
In certain cases it might be acceptable to leave out stitching altogether, however it is advisable to stick to the method of creating stitches as “2D” floater objects with stitching textures applied to them.
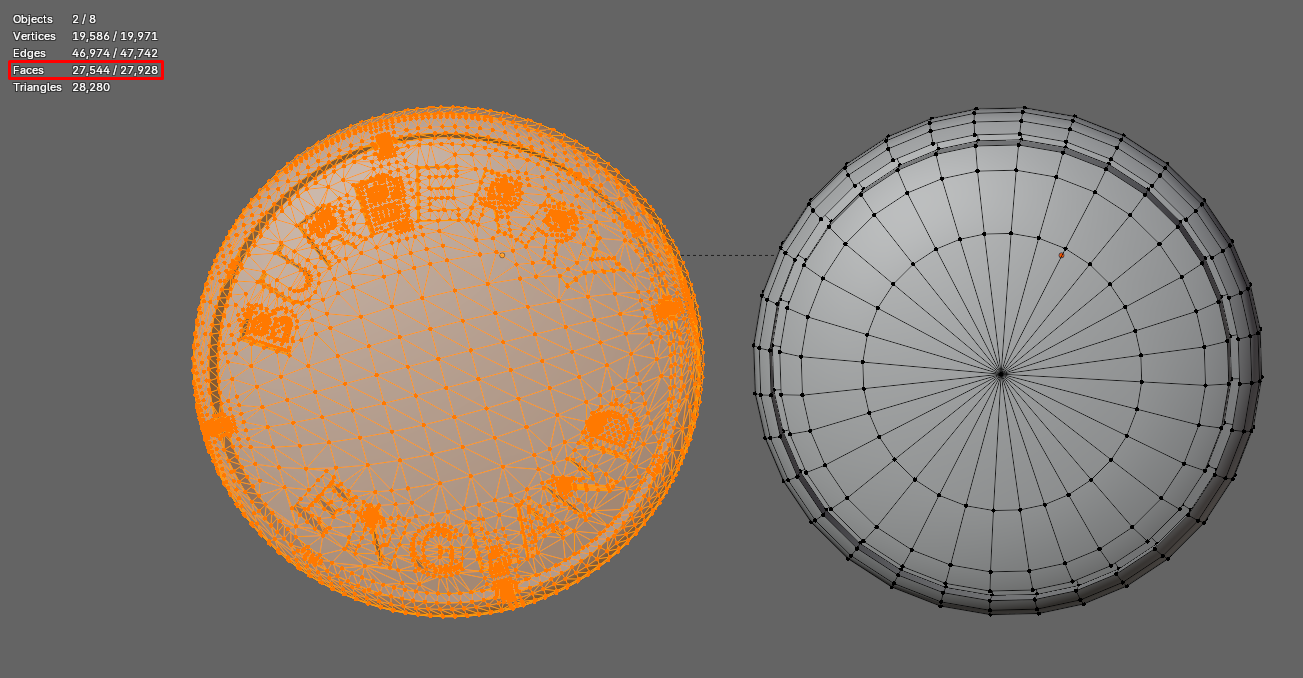
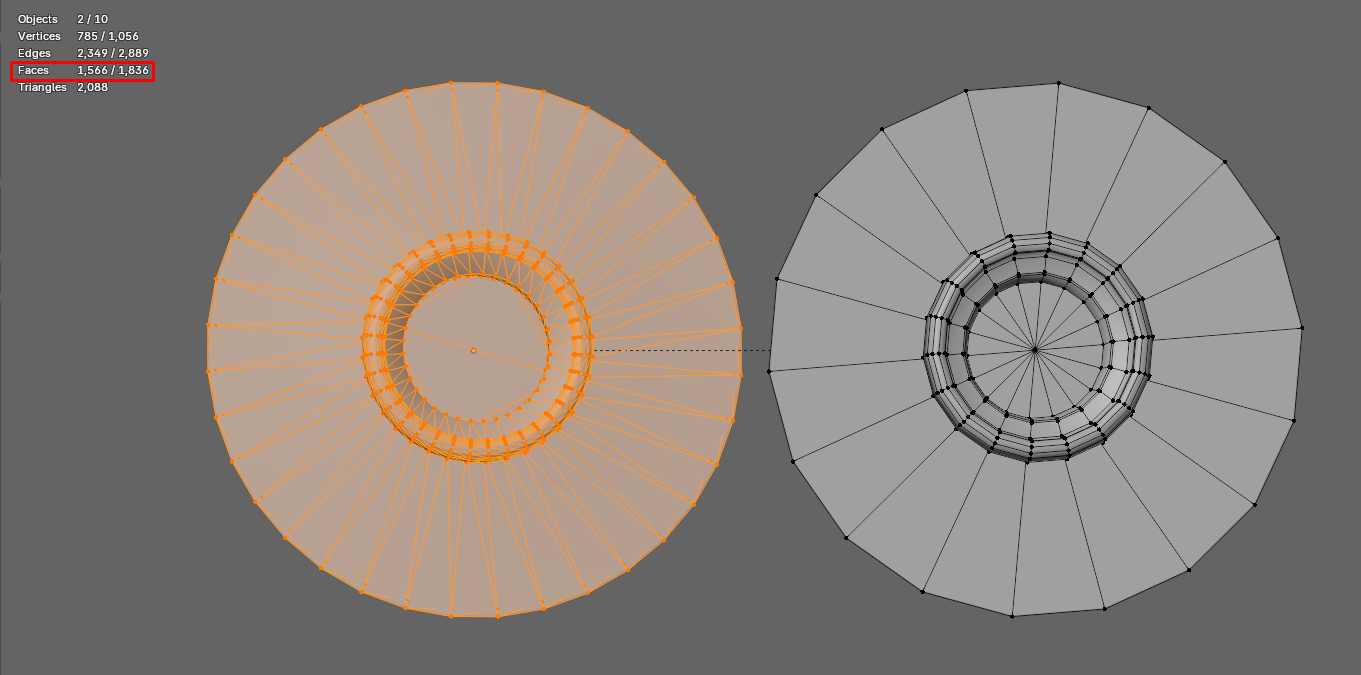
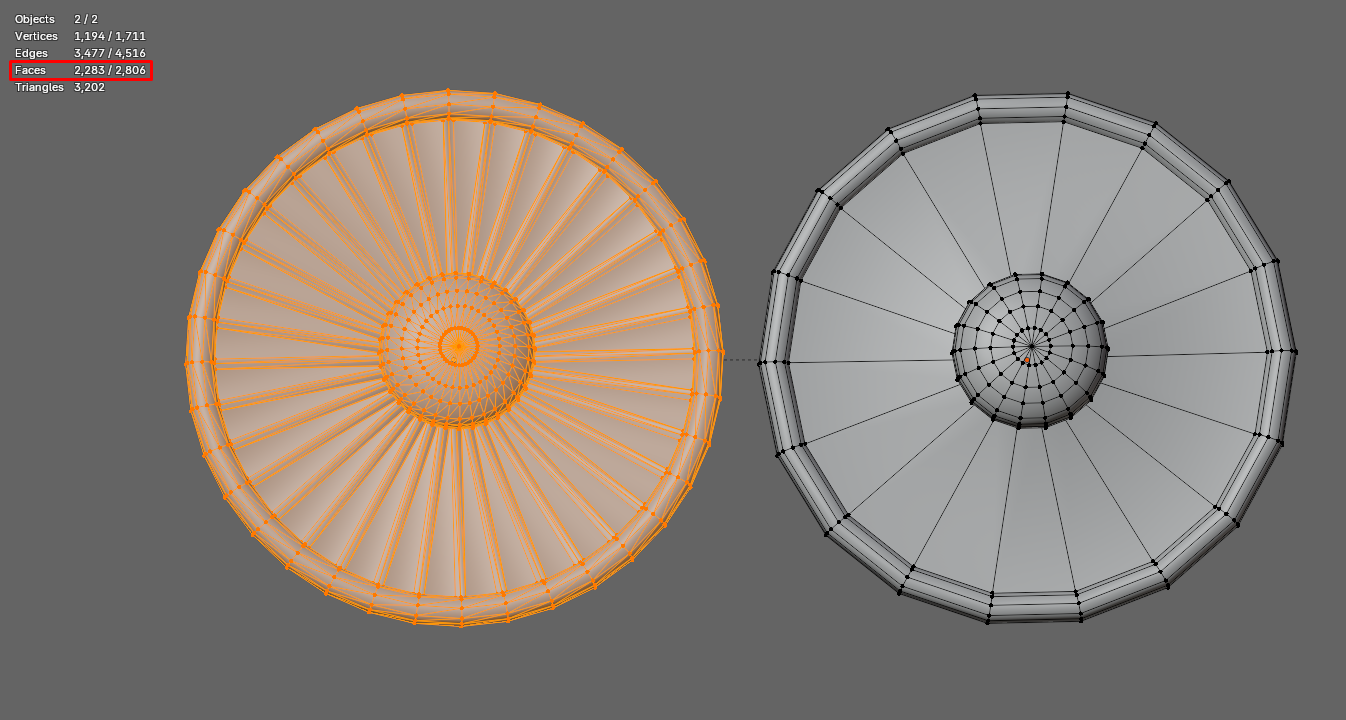
As the engraving on rivets is hardly noticeable from a distance, it is best to recreate these parts, leaving out all unnecessary detail. Shown in Figure 4. on the left is the original rivet made out of 27,544 polygons, while the optimized rivet on the right is made out of less then 400.
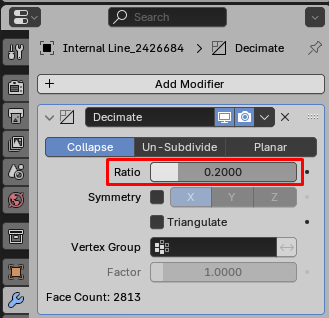
A quick and easy method of dropping the polycount on large surfaces is using the Decimate modifier. By lowering the Ratio value the number of polygons will drop. Opt for as low of a value as possible, while maintaining the silhouette and polygon flow distinguishable. Before applying the modifier make sure that overlapping faces have been taken care of by merging vertices by distance.
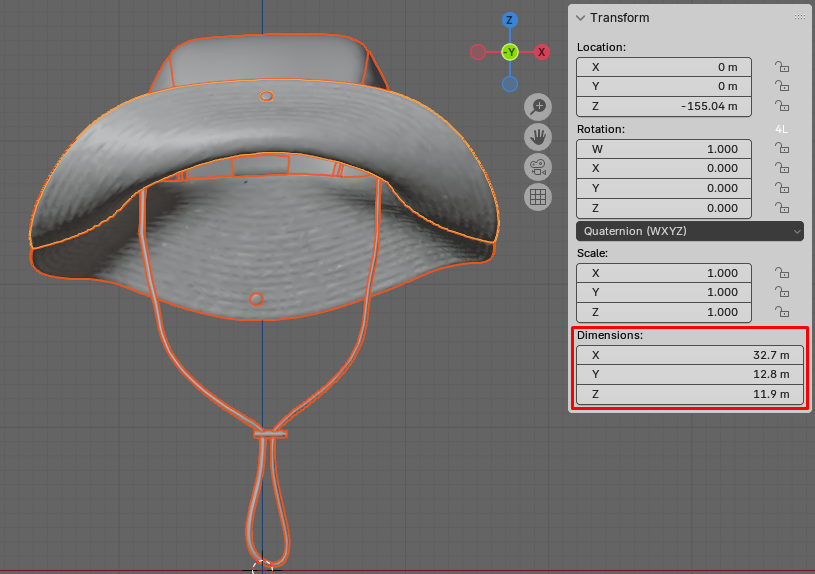
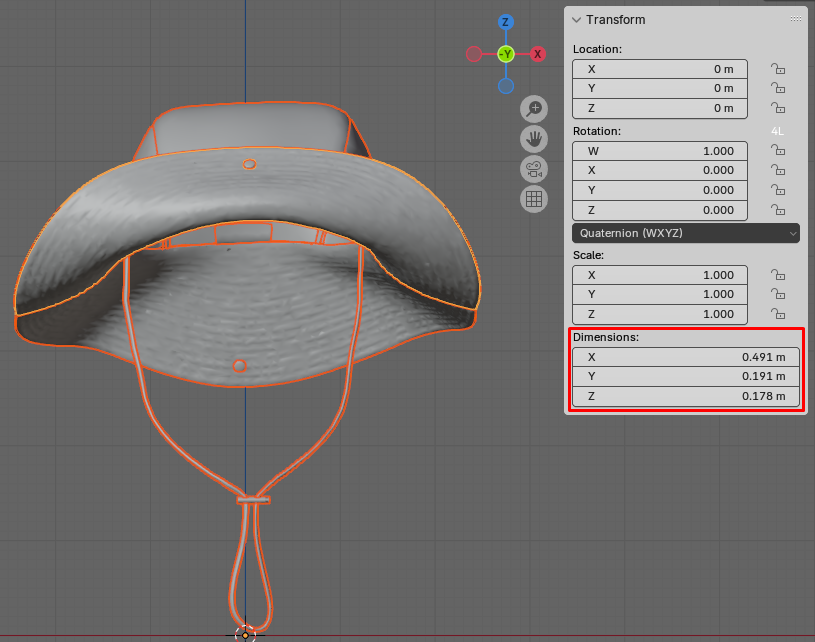
Once model optimization has been taken care of, a couple of steps should be taken to make sure the model performs well on the platform. Such steps include checking the size of the model, applying transforms and placing the model near the origin of the 3D space.
On top of all that, meshes with linked materials might be joint into a single mesh, to speed up the process of assigning materials on the platform, but this step is neither mandatory nor suggested in all cases.
By following the optimization pipeline, the polycount of this asset has been dropped from over 5 million to 52k polygons, which is a great success.